Monday, April 30, 2012

DIY T-Shirt Rag Quilt

Disclaimer... I am NOT an expert seamstress, in fact I'm just a beginner and since I'm trying to teach myself I probably do just about every step backwards.  But, that being said this was my first attempt at a "quilt" and to my surprise it turned out pretty well so the moral of this silly story is if I can do it you can too! :)
This project all started because my husband has what I like to call a rather larger "t-shirt problem."  I have never actually counted how many he has mainly because it would take too long but it's safe to say this guy has rubber BINS full.  I'm pretty sure he has never thrown out a single one since he was in high school and sadly we haven't been there in a LONG time :)  But to be fair I am in no position to complain about quantity of clothing, the poor guy was booted out of our big walk in closet an exiled to the hall closet just to give me more room!  I know I am awful!!! I did however make him a deal if he would part with some that are special (mostly college t-shirts) that he never wears I would try to make him something useful and the t-shirt quilt was born :)
I am impatient and a novice sewer, so to speed things up and keep my squares the same size I took a little help from "Tucan Sam".
After decidig how big I wanted my blocks I cut out the cardboard and then laid my long ruler just a little over that edge so that I wasn't accidentally cutting into the cardboard and cut all four sides.
You should end up with a big stack of squares.  Don't worry if they aren't perfect (mine surely were not) you are going to rough up the edges later so it will work out just fine.
 I only used the fronts with the logos that I wanted, but I cut through both sides at one time. For one to make it easier and two to have the blank blocks from the back of the t-shirts in case I needed them to fill any open spaces.
Now lay out the squares on your fleece or whatever you decided to use as the back until you have the number and layout you want.  How many you will need obviously depends on how big you cut your blocks and how big you want the blanket.  I chose fleece so it would be soft and cozy.  For a 2 yard cut of dark grey fleece I needed 20 blocks (five rows of four)
Now the sewing begins. 
I took one horizontal row at a time and wrong sides together sewed together the connecting edge.
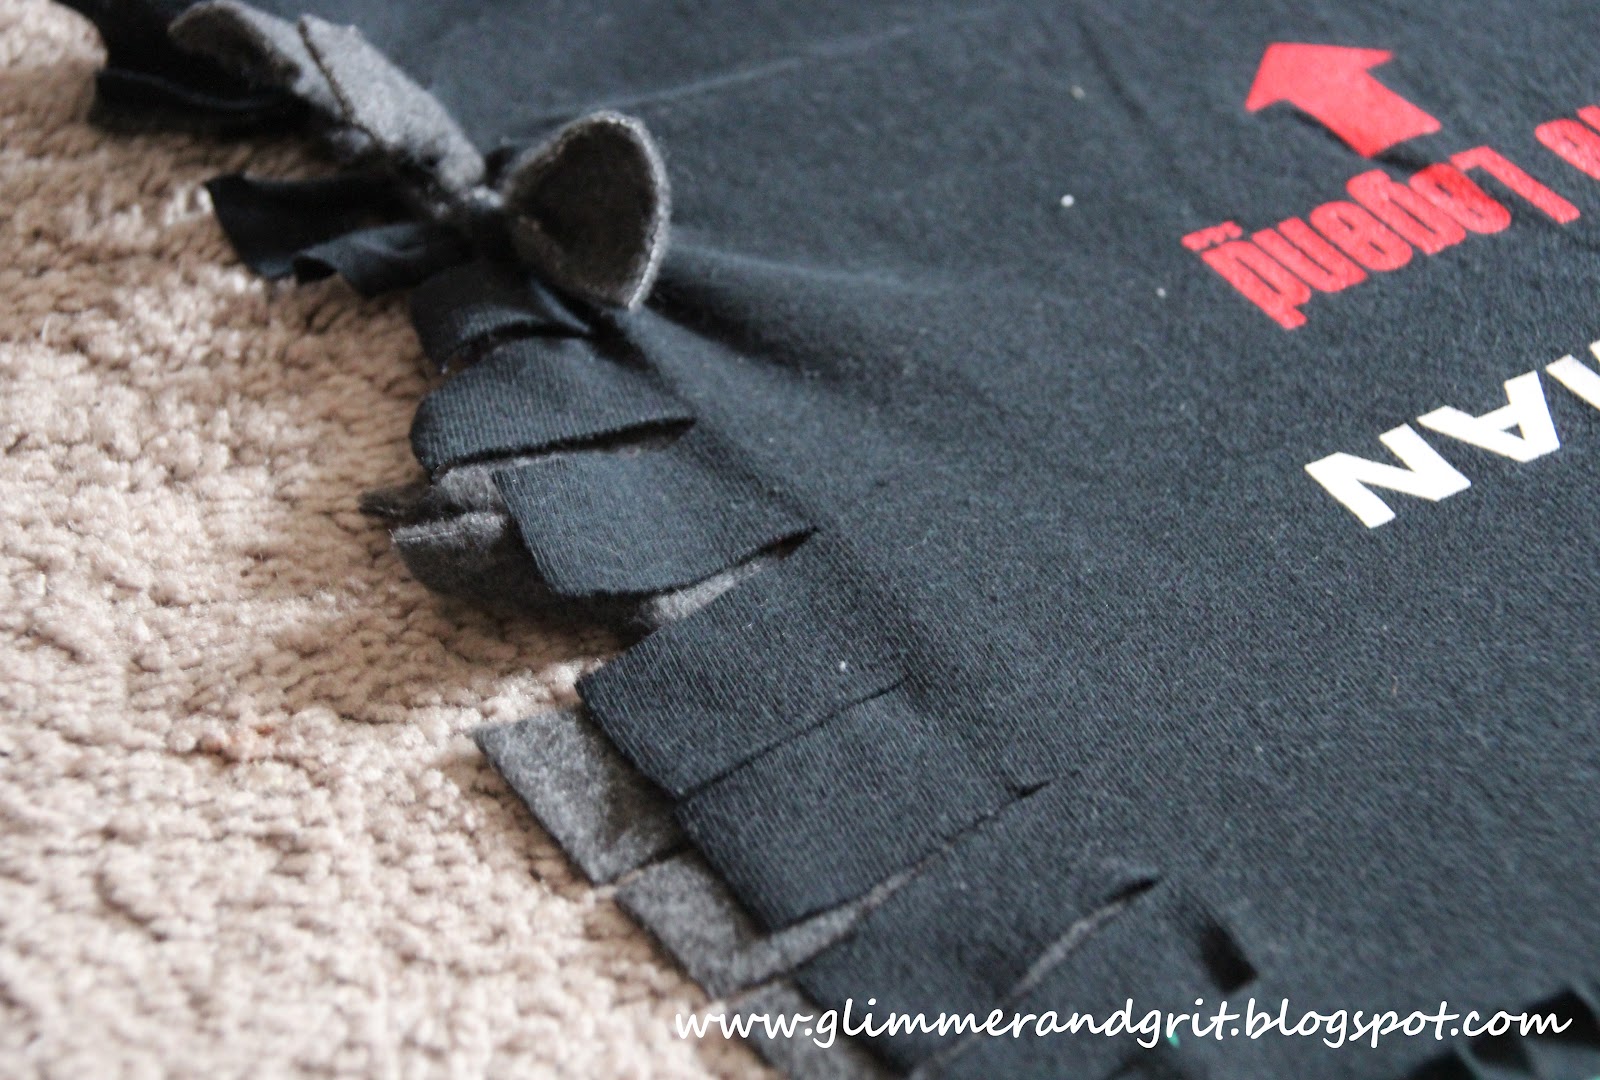
I plan fringe the excess when I'm done so I don't mind that the edge is exposed.
Once all of your blocks are connected in rows it should look something like this.
Now sew the rows together the same was you did the squares, leaving that 1/2 inch seam allowance so you can fringe it too.
Grab your scissors and get to cutting.  Snip into all those excess seams, you can make those as close or far apart as you want just be careful not to get to close to the stitches you don't want to cut what you just sewed together.
Not only does it look neat this also helps cover up any not so straight sewing... not that I would ever do that :)
To connect the fleece backing and t-shirt front you can cut strips and just tie them together like a no sew fleece blanket.
To keep with the same theme I decided to just sew all the way around the blanket connecting the front and back and then fringing that as well.
I'm pretty excited with how it turned out.  I have been looking at this pile of t-shirts for months terrified to give this a try, but once I got going it really went fast and I think my hubby is going to like it.  Hey at least there's one less "pile-o-shirts" in our house :)
This could be a great way to keep kids clothes that they love or to create a college keepsake.  I'm so glad I finally gave it a try and trust me if I can do it ANYONE can :)

Good Luck, Lindsey

Friday, April 27, 2012

DIY Crayons 3 Ways

It's another rainy day in our part of the word so the kiddos and I were looking for a fun little project to pass the dreary day and we totally scored with this one :)  Making their own crayons made everyday coloring that much more exciting!
 We had plenty of broken crayons on hand, but you could just pick up a box or two at the dollar store and you are ready to get started.
 This part is the longest of the project, but even it doesn't take long.  Unwrap your crayons and then if they aren't already broken break them up to fit into your mold.  For method #1 I used a heart shaped silicone candy mold.
 My little guy was a big help, especially with the breaking... big shocker :)
 Now just pop the mold into a 230 degree oven for about 10 minutes, just until the crayons are melted. 
 Let them cool and ta-da.. pretty cute huh?
 I must admit a little DIY uh oh! I did put my mold on a baking sheet, but part of it didn't survive :(  I've seen other posts using this method and they didn't have any issues with melting so I guess I'm just the unlucky one!  I'm totally going to blame my oven it must have gotten hotter than it claimed.. so just be careful and make sure your oven doesn't get too hot.  You just need to melt the crayons and that doesn't take much, if you are worried maybe try 200 degrees for a few extra minutes just to be safe :)
For method #2 I used a mini muffin tin.  I first sprayed the tin with a little coking spray just to make sure the crayons would pop out once they cooled, then followed the steps from above... unwrap, break, bake and cool.


`
The little circle popped right out of the tin and are the perfect size for little hands.
For method #3 I wanted to put my own twist on this idea so I decided to use a regular muffin tin lined with cupcake wrappers.

To give these a fun unique shape I used the technique from my heart shaped cupcakes.  After you've melted the crayons for about 10 minutes at 230 degrees pull the top of the liner back a little and carefully push a marble all the way to the bottom of the tin and let the crayons cool.

 This is what they look like once they've cooled fully and are taken out of the liner!  For some reason they make me hungry, those crinkled edges remind me of a rainbow colored reese's peanut butter cup.. hehe!
These are so easy to make and would be adorable as a party favor or paired with a coloring book they are a fun way to spice up an inexpensive gift!  I wrapped a combo of the three shapes in little bags and gave them to my kiddos as a fun treat after their nap.. (aka mommy's daily sanity session) :)
 THEY
LOVED
 THEM :)

 Hope you like them too!

Enjoy, Lindsey :)

Sunday, April 22, 2012

Kitchen Sink Cookies

Last year I had these amazing cookies at an event and I have been trying to recreate them ever since. They were big, thick and full of all these amazing flavors.  The owner of the bakery didn't give me the recipe, but she did share a few of the ingredients.. coconut with the oats gives the great texture and almond extract adds another unexpected flavor.  With those tips I took a basic oatmeal cookie recipe and started experimenting. I am by no means a master baker, but this is what I came up with and they were devoured in our house so I guess they turned out alright :)

Glimmer & Grit Kitchen Sink Cookies
2 cups flour
1 cup quick oats
1 tsp. baking soda
1/4 tsp. salt
1 tsp. cinnamon
2 sticks butter
3/4 cup brown sugar
3/4 cup white sugar
2 eggs
1 tsp. almond extract (or vanilla your choice)
add-ins
1 cup coconut
1 package chocolate chips (white or regular)
1 cup nuts (I used chopped pecans, but macadamia nuts are delicious too)
1 cup dried cranberries (raisins or dried cherries are also great)
First cream the butter and sugar, then add the eggs and almond extract. Now mix the flour, oats, salt, baking soda and cinnamon together, then add slowly to the wet mix.
I use a small cookie scoop to make them all nice and uniform. 
Aren't they cute?!? OK, I'm obvious easily impressed :)
Bake these little gems for 10-12 minutes at 375 degrees until golden brown.
Finally try to eat just a few, or at least just a few in front of your family and then have a few later when no one is looking :)
These are so yummy and the recipe can spiced up every time you make them depending on what you have on hand.  I used dark chocolate, pecans and dried cranberries (yummy), but white chocolate, dried cherries and macadamia nuts is maybe my favorite combo so far!
See all that goodness packed inside!!!
And bonus this cookie dough freezes great!!!  If you have very little willpower LIKE ME... make one pan and stick the rest in the freezer.  This way you can't eat TOO many, and you'll have a sweet treat ready to just pop in the fridge whenever you need it!

Enjoy, Lindsey :)

Thursday, April 19, 2012

DIY Color-Block Heels

 
Color - Blocking is very poplar right now in fashion and I really think it's fun.  But my overflowing closet needs another pair of shoes like I need another cupcake! Not very badly!!!!  Unless there is lots of frosting, then I can't say no... ok focus back to the shoes :)
So the next best thing is to re-purpose a pair I already have.  These are just a pair of Target heels that I have had for a few years and worn only once or twice so they seemed like the perfect candidates.
I am a sloppy painter so I taped off the edges with Frog Tape, I like it much better than blue painters tape.  But if you have a steadier hand you can skip that part.
Now pick a color and have fun!  I decided on this turquoise acrylic paint, it's super cheap and there are tons of colors. I ran out of sponge paint brushes so I improvised and used a makeup sponge!!!  Not the normal use, but hey it worked :)
Let them dry, remove the tape and ta-da!!!
Fun, fashionable and fabulous for just a few pennies.
It's amazing how just a little paint gave new life to forgotten footwear.  I can't wait to wear these and have fun with this great pop of color.  Hope you like them too!  
Grab a pair in your closet and give them a spring face life today!

Good Luck, Lindsey :)